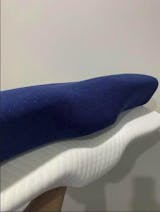
How do you make homemade cervical support?

The article briefly overviews cervical support and its importance for neck health and comfort. It introduces the idea of making a homemade cervical support solution to customize support according to individual needs and preferences. This homemade approach is a cost-effective and satisfying project that can result in cervical support tailored to specific requirements.

Understanding Cervical Support

What is Cervical Support?

Cervical support refers to the support provided to the neck, particularly the cervical spine, which is the uppermost part of the spinal column. This support helps maintain the natural alignment of the neck and spine, reducing strain and discomfort. 

Role of Cervical Support in Maintaining Neck Health

Cervical support or cervical pillow plays a vital role in maintaining neck health. It helps alleviate neck discomfort and stiffness, especially for those who spend long hours in a single position, such as working at a desk or driving. By providing support, it reduces the strain on the neck muscles and ligaments, promoting better posture and preventing long-term damage to the cervical spine.

Materials Needed for Homemade Cervical Support

List of Materials Needed

To make a homemade cervical pillow, you will need the following materials:

  • A soft, durable fabric such as cotton or fleece.
  • Polyester fiberfill or foam for stuffing.
  • Sewing machine or needle and thread.
  • Measuring tape.
  • Scissors.

Where to Find These Materials?

These materials can be easily found in local craft stores or online marketplaces. Some may even be available at home, making this a cost-effective project.

Safety Considerations When Choosing Materials

When choosing materials, it’s important to ensure they are safe and comfortable for use. The fabric should be soft to prevent skin irritation, and the stuffing material should be firm enough to provide adequate support but soft enough to be comfortable. All materials should be hypoallergenic to prevent allergic reactions.

Step-by-Step Guide to Making Homemade Cervical Support

Detailed Instructions

Here are the step-by-step instructions to create the homemade cervical support:

  • Measure the length and width of the area where the cervical support will be used.
  • Cut two pieces of fabric using these measurements, adding an extra inch for seams.
  • Place the two pieces of fabric together, right sides facing each other.
  • Sew along the edges, leaving a small opening for stuffing.
  • Turn the fabric right side out through the opening.
  • Stuff the fabric with polyester fiberfill or foam until it is firm but comfortable.
  • Sew the opening closed to secure the stuffing inside.

Helpful Tips for Each Step

  • Ensure the measurements are accurate to provide the right amount of support.
  • Choose a comfortable and durable fabric that can withstand regular use.
  • Make sure the stuffing is evenly distributed for consistent support.

Using Your Homemade Cervical Support

How to Properly Use the Homemade Cervical Support

The homemade cervical support should be placed under the neck while lying down or sitting up. It should align with the curve of the neck to provide optimal support. Adjust the position as needed to ensure comfort and support.

When and Where It Can Be Used

The homemade cervical support can be used at home, in the office, or while traveling. It’s especially useful when you’ll be in one position for an extended period. You can use cervical support during sleeping to restore the neck curve or prevent slaughting at desk

Safety Precautions to Keep in Mind

While using the homemade cervical support, ensure it does not cause any discomfort or strain. If discomfort persists, stop using it and consult a healthcare professional. Remember, this homemade solution is not a substitute for professional medical advice or treatment.

Maintaining Your Homemade Cervical Support

Tips on Maintaining and Clean the Homemade Cervical Support

Maintaining your homemade cervical support is crucial for its longevity and effectiveness. Here are some tips:

  • Regularly check for any wear and tear.
  • Clean the cervical support by spot cleaning with a mild detergent and warm water. Avoid soaking it completely as it may damage the stuffing material.
  • Allow it to air dry completely before using it again to prevent mold and mildew.

When to Consider Making a New One

Consider making a new homemade cervical support when:

  • The current one is no longer providing adequate support.
  • It has become uncomfortable to use.
  • It shows signs of significant wear and tear.

Remember, while homemade cervical support can provide temporary relief and comfort, it is not a substitute for professional medical advice or treatment. If you’re experiencing persistent neck discomfort or other health issues, it’s important to consult with a healthcare professional.

Conclusion

The blog provides instructions on how to make a homemade cervical support for temporary relief from neck discomfort and better posture. It highlights the cost-effectiveness and customizability of the solution, encouraging readers to embark on the project for both enjoyment and practical benefits.

FAQs:

  1. What is cervical support?
    Cervical support refers to the support provided to the neck, particularly the cervical spine, which is the uppermost part of the spinal column. This support helps maintain the natural alignment of the neck and spine, reducing strain and discomfort.
  2. Why should I consider making a homemade cervical support?
    A homemade cervical support allows for customization according to individual needs and preferences. It can be a cost-effective and satisfying project, providing you with a cervical support that fits your specific requirements.
  3. What materials do I need to make a homemade cervical support?
    You will need a soft, durable fabric such as cotton or fleece, polyester fiberfill or foam for stuffing, a sewing machine or needle and thread, a measuring tape, and scissors.
  4. How do I use a homemade cervical support?
    The homemade cervical support should be placed under the neck while lying down or sitting up. It should align with the curve of the neck to provide optimal support. Adjust the position as needed to ensure comfort and support.
  5. How do I maintain my homemade cervical support?
    Regularly check for any wear and tear. Clean the cervical support by spot cleaning with a mild detergent and warm water. Avoid soaking it completely as it may damage the stuffing material. Allow it to air dry completely before using it again to prevent mold and mildew.
Back to blog